Where Shadows Slumber: Working On A Small Team

Editor’s Note: The post was almost titled ‘Working with Frank Suxxxxxx’, but I decided against it (mostly because it’s not true).

So, you want to be a game developer, do you? You want to be the voice behind the games that so molded your childhood? You want to create an experience for generations ahead to enjoy?

Well, the best way to do that is probably to get a job at-

What’s that? Oh, you want to be in charge of the game development. You don’t want to work on a game, you want to create a game. You don’t want to help someone else make their game – you want to make your own game, in your own voice.

In that case, it looks like you want to become an indie game developer. You get to design your own games the way you want to, which is a thrilling concept. However, it’s not all fun and games and I-don’t-have-a-real-boss, and you should probably know exactly what you’re getting into.
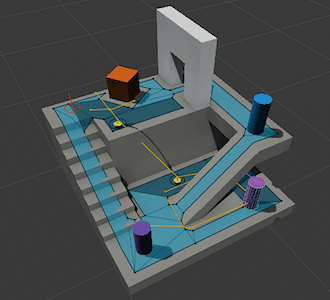
MNCvsStartup

Choices, choices…

Now, I’ve never worked at a professional game development studio, so I can’t give you an entirely clear picture of what you’re missing out on there. I do have some experience with different-sized companies though – my last job was at one of the biggest banks in the world, my current company employs no more than seven people, and I, of course, am on the two-person Where Shadows Slumber team. So, hopefully I can give you a good overview of the differences between these types of jobs and companies, so that you know what you’re signing up for.

There are a lot of differences between small teams and large teams, and there are a lot of similarities. I’m going to go over some of the things that are better about each. These lists won’t be absolutely complete, but I hope I can sketch out a rough image of what life looks like at these different jobs.

Also, real quick, I just want to mention that if I say something bad about working on a small team, I am not necessarily referring to Frank, or anyone at my current job. I’ve been on a lot of small teams over the years, and these are just my general observations, not passive-aggressive pain points meant to make my colleagues feel bitter.


The Bigger, the Better

BigFactory

Cubicles, as far as the eye can see!

For the most part, when I tell someone working in technology that I worked for a large bank, I get a negative response, or maybe some sympathy. It seems that it’s not viewed as the ideal technological job. While bureaucracy isn’t exactly my thing, I will say that I did enjoy my time there, for a number of reasons:

  • Responsibility – The thing I liked most about working at a big company was a lack of responsibility. Maybe that’s my 16 year-old slacker self talking, but there’s something really satisfying about not having to worry about the future of the company. Had a bad quarter? As long as I still have a job, I don’t really care! There’s a tough decision to be made? Glad I don’t have to decide! While this isn’t the best way to be thinking about the company that’s providing your livelihood, it is a somewhat calming thought.
  • Funding – I suppose this one is the most obvious reason why a big company might do well. There’s a lot of cash money floating around in the company, so any project the company decides to pursue will be well-funded. Along with this comes a lower chance of failure. Since you already have funding, and you already have a name people recognize, most of your projects will be much more likely to turn a profit. They say that 90% of startups fail very quickly, making startup jobs very volatile. Getting a job at a large company, however, might end up lasting far longer than you even want it to!
  • Specialization – When I worked at the bank, I was on the identity management and access control team. If someone had a question about SSO, security, trading, or anything else, they wouldn’t come to me. I only had to worry about identity management and access control concerns. You end up specializing in a certain area, and that area is your only concern, so you can really learn a lot about it.
  • No Personality Clashes – This is one you don’t really consider that much, but it can be a biggie. Working in close proximity with the same people day after day will probably happen wherever you end up. However, that situation gets a lot more interesting when you have to continuously make difficult decisions with those people. If you disagree, how will you resolve it? There’s no ‘boss’ you can go and ask – you have to work it out. This doesn’t sound too bad, but that’s only because we don’t really notice other people’s personalities until we’re already in the crucible with them. Maybe your partner is incredibly stubborn, and you can’t convince her to change her mind about something. Maybe he’s really arrogant, and he’ll never even consider that your idea might be better than his. Whatever the situation, you need to be able to resolve it. (again, this doesn’t refer to anyone in particular).
    This situation, however, is less likely to occur at a large company. If you disagree with a colleague, you can ask your boss, or quote company procedure, or ‘escalate’ the issue to their boss. In the majority of cases, you’ll only have to work with that person a handful of days out of the year anyways!


Less Is More

booth

Just one booth?

As good a case as I made for big companies, working on a small team has also been really awesome. Here are some of the reasons:

  • Decision Making  The first and most important benefit of working at a small company (or, in particular, your own company), is being involved in the decision-making process. When you’re one of the only five people making decisions about your product, you have a lot more say in the outcome. People take your opinion seriously, and you can actually make a difference in the product. This, I imagine, is the biggest reason that people like to work at smaller companies – if I want to make a game that’s really mine in some sense, then the bigger an impact I have on that game, the better.
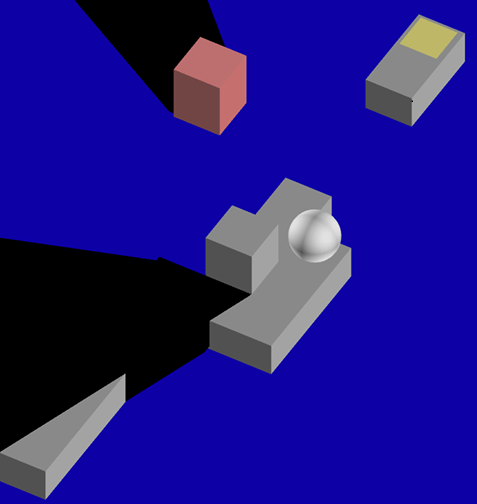
  • Creative Freedom – This is another biggie, and it’s very similar to the above. I don’t want my boss to tell me that the Ring of Blood item should be red – I want to make that decision myself – maybe I want it to be green! That might not be a great idea, but at least it’s my decision.
  • Pride – When you make something awesome, you have a lot of pride in it. When you’re one of the main reasons that a project is completed, you feel a lot more pride in it than if you only helped out a little. Saying ‘look at my awesome game’ feels a lot better than ‘look at my company’s awesome game’.
  • Learning – When you’re working on a large team, you might end up being a ‘guy’. You might be the ‘shader guy’, or the ‘pathfinding guy’, or whatever. However, when you’re working on a small team, you have to be all of the ‘guy’s. For Where Shadows Slumber, if there’s anything that counts as a programming task, I’m the one responsible for it. That means I have to be an expert on everything. This can be viewed as a bad thing (and I even listed it as a benefit of working at a big company), but I prefer to think of it as a learning opportunity – I know a lot more about shaders now than I would have if I had a ‘shader guy’ to take care of it for me.
  • Working with Friends – Yes, I listed this as a startup-con before, but there’s still something to be said for working with your friends. While it can lead to some messy situations, it can also lead to some brilliant teamwork and a very fun working environment. You just have to make sure you know how to deal with each other before you start working together.


The Dream Team

So, what is the ideal team to work on? In particular, what is the ideal team for you to work on? What’s your dream team? Unfortunately, I can’t answer that question. What I can do is tell you about my experience with small teams, and what I’ve learned from it.

17159203_1817437325174646_6524966612565150056_o

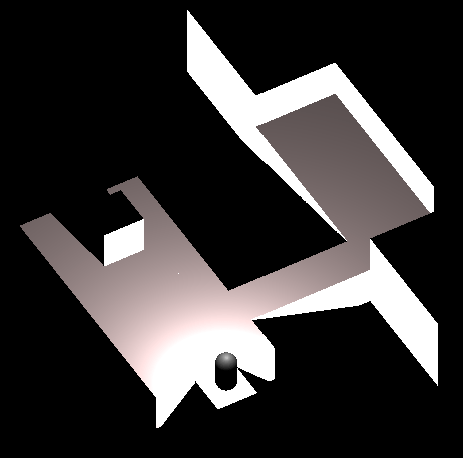
This is it. This is the dream team.

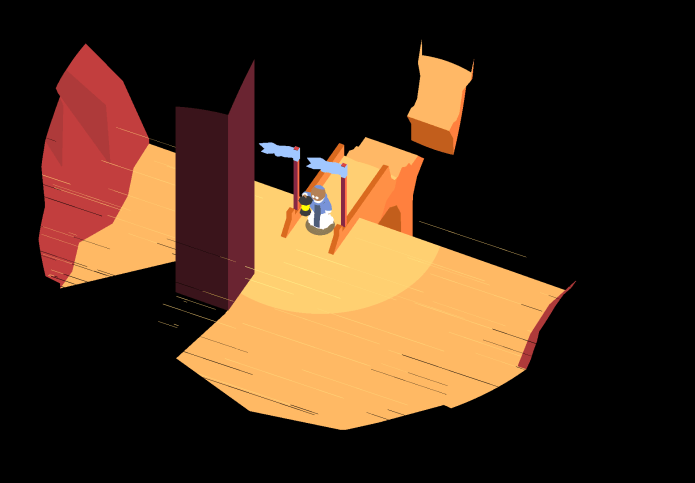
Striking out on your own is an exciting prospect. Thinking forward to a future where you’re publishing a game and making enough money to not die is awesome, and knowing that you get to make any and all decisions about that game, making it truly yours, is inspiring. You’ll sit down at a booth to show off your game, someone will ask you how big your team is, and you’ll get to smugly reply ‘it’s just us’. You don’t answer to anyone, and you’re the only one who gets to change your game.

This is also an exhausting experience. Continuing to work hard on your game, knowing the chances of failure, can be very discouraging. Working on the same project every single day, seeing the glacial progress, and still believing that you’re going to ‘make it’ is sometimes impossible. Arguing endlessly with your team members and looking forward at another year of difficult decisions, knowing you still have to work with them every day, is a near-insurmountable mental and emotional hurdle. Not to mention the pressure to succeed, especially if you’ve decided that this will be your only occupation. It’s a task that not everyone is cut out for.

The option I went for ended up being a blend of both. I worked at a big company as my actual job, and worked on Where Shadows Slumber as a side project. This allowed me the freedom to create my own game in my own voice, without having the stress and pressure of living on an indie game development salary. This is an option I would recommend, although I will say that it can be more difficult than either of the alternatives, since you end up doing more day-to-day work, but your game takes even longer to complete.


I can’t tell you exactly what kind of team you should be trying to work on, or if indie game development is the career for you. No matter what I say, if you’re meant to be an indie game developer, you will be. All I ask is that you know what you’re getting into before you take the plunge.


= = = = = = = = = = = = = = = = = = = = = = = = = = = = = = = = = = = =

Hopefully this gives you some insight into the world of small teams, and I didn’t scare you off too much. If you have any questions or comments about working on a small team (or anything else), you can always find out more about our game at WhereShadowsSlumber.com, find us on Twitter (@GameRevenant), Facebook, itch.io, or Twitch, and feel free to email us directly with any questions or feedback at contact@GameRevenant.com.

Jack Kelly is the head developer and designer for Where Shadows Slumber.

Mechanic Spotlight: Pathfinding

For a game like Where Shadows Slumber, the most basic interaction you have is to tell the character to move to a spot. If he’s a good boy, he’ll do what you say, deftly dodging pillars and chasms as he winds his way toward the destination. You don’t even have to tell him how to get there – he’ll figure it out!

This leads us to the topic of pathfinding, the process by which the character figures out where to move. Pathfinding is very common in game development, and can be summed up with a single question:

How do you get from point A to point B? Rather, what’s the best way to get from point A to point B?

This is the question that encapsulates the idea of pathfinding. In the real world, I tend to take whatever public transit is available, and walk the rest of the way. Some people open up their GPS, hop in their car, and follow the directions. You could even simply determine the direction you’re going, grab a compass, and just start walking.

Each of these is an example of a pathfinding algorithm. The algorithm is a set of instructions which determines exactly how to get somewhere. Pathfinding algorithms in games are a little different from the ones listed above, but the concept remains the same. Given a starting point, a destination, and some information about the surroundings, how should you get there?


Finding a Path in the Darkness

Pathfinding is a pretty common concept in computer science, even outside of gaming. It has received a lot of attention and study in the computer science world, so I won’t get into the intricate details and just stick to the broader points. If you want more details, there are plenty of pathfinding intros and tutorials out there.

silnxeb6eaey

The leading theory for the motivation behind Dijkstra’s Algorithm

Some number of years ago, a cool bro by the name of Dijkstra came up with a good pathfinding algorithm, appropriately dubbed Dijkstra’s Algorithm. Years later, a variant known as A* Pathfinding is still a favorite among game developers, and is the algorithm I decided to use for Where Shadows Slumber.

The basic idea behind A* is to divide your map into a set of areas, which I have taken to calling ‘nodes’. For each of these nodes, you determine which other nodes it’s connected to, and how hard it is to move between the nodes.

What do I mean by that? Imagine you’re standing in front of a fence, and you want to cross to the other side. In this case, the best path is probably just to climb over it. However, if there’s an open gate in the fence a few feet away, that might be the best route to take. Even though you’re travelling more distance, that path is faster, or at least easier. In the same way, each node has a ‘pathfinding cost’, indicating the difficulty to cross it. Our ground node might have a cost of 1, whereas the fence node could have a much higher cost of 10 or so, since it’s so much more difficult to cross.

Once you know what your nodes are, and how they’re connected, the A* algorithm will efficiently loop through and figure out which nodes you should travel over. After that, all you have to do is move the character from one node to the next, and you have pathfinding!


Nodes

I kind of glossed over the whole idea of nodes earlier. A node is a representation of a point in which the character can stand. He cannot stand anywhere where there isn’t a node, or in between two nodes, and he can only travel from node to node. Every path in the game is made up of nodes.

Pathfinding1

An ‘under-the-hood’ look at nodes in Where Shadows Slumber

A node consists of three parts:

  • The node position, shown as a dark sphere in the center of the node, indicates the position the character will be in when he is on this node. This position is usually the same as the node’s position, but there are some cases where it needs to be different.
  • The click detector, shown as a blue cube, is simply a big box with a collider on it. That way, we can detect when you click on the node, and start the pathfinding. Different types of nodes can have different colliders – a normal node has a cube collider, but a ramp node might have a triangular prism collider or something.
  • The boundaries, shown as small pink spheres, determine which other nodes this node is connected to. Since nodes are appearing and disappearing throughout the game, we need to be able to know which nodes should be connected. If two boundaries are in the same location, that means their nodes are connected. In the image, each node along the path is connected to the next, because their boundaries are in the same spots.

With these three parts, the nodes are able to fit together and provide all of the information necessary to, at any point, determine what path the character should take.


Follow the Path

Once we determine the path, then what? How do we follow it? A path is a series of steps: move from Node A to Node B, then move from Node B to Node C, and so on. To this end, the nodes each have another property: nextNodeInPath. Each node stores a reference to the next node in the path. In every frame, the character checks his current node. If it has a next node, the next node is still enabled, and the two nodes are still connected, then he starts moving there!

Pathfinding2

Using Debug.DrawLine to show the character’s path in light blue

In this way, the character will make his way along the path determined by the algorithm. If he comes to a node which he can no longer get to, then he’ll stop. This allows us to create a path, and we don’t have to think about it too much after that. The player will automatically follow the path, and, if the path somehow becomes broken, he’ll stop at the end of it.


Unity’s Pathfinding

If you’re familiar with Unity, you may have heard that, being a nice little game engine, Unity provides its own pathfinding. In fact, the earliest versions of Where Shadows Slumber used Unity’s pathfinding.

However, Unity’s pathfinding didn’t end up being what we wanted for this game. In the same way that Unity’s Standard Shader was too detailed for out game, we found that Unity’s pathfinding gave the player too many options. Where Shadows Slumber was designed to be grid-based, whereas Unity’s pathfinding allows the player to roam around within different areas.

navmeshcover

Unity’s pathfinding

While this isn’t too bad – it wouldn’t be hard to use Unity’s pathfinding, but restrict it to a grid space – there is a reason we decided against using it. One of my professors always told me that ‘you can never know how efficient – or inefficient – a piece of code is, unless you wrote it yourself’. This is a piece of advice I have carried with me ever since, as I find it to be fairly accurate. Therefore, unless Unity’s pathfinding provides exactly what I want, it makes more sense to implement my own pathfinding system. That way, I can know exactly what’s good or bad about my system, what sacrifices I can make, and how best to use it.

Don’t get me wrong – Unity’s pathfinding is pretty cool, and if it makes sense for your game, you should use it. It’s just not the exact solution we needed, so we decided to implement our own.

So, that’s how pathfinding is implemented in Where Shadows Slumber! As I mentioned, I skipped over a lot of the finer details, but I hope this was a good, quick intro to the way that we implemented pathfinding and some of the choices we made.

If you have any questions or comments about pathfinding (or anything else), you can always find out more about our game at WhereShadowsSlumber.com, find us on Twitter (@GameRevenant), Facebook, itch.io, or Twitch, and feel free to email us directly with any questions or feedback at contact@GameRevenant.com.


= = = = = = = = = = = = = = = = = = = = = = = = = = = = = = = = = = = =

Jack Kelly is the head developer and designer for Where Shadows Slumber.

Where Shadows Slumber: Testing

This week marks the deployment of our first batch of test levels, assuming I haven’t totally screwed up and delayed them. Throughout the past few months, we’ve been building a list of testers, and it is finally time to put it to good use!

If you’re on the list and you have an iOS device, you should have received an invitation to our TestFlight over the weekend. If you’re on Android, you can expect a similar email later this week. If you’re not on the list (or don’t know if you are), just let us know! We haven’t hit the limit on testers yet, and every pair of eyes helps us make a better game.

Frank already wrote about our testing, and why we’re doing it. This post touches on a lot of the same things, but I want to delve a little bit more into the benefits of testing.


Mommy, look what I made!

A child returns home, an exuberant look on her face. “Mommy, look what I made!” she exclaims, holding up a piece of construction paper covered in marker lines and dried macaroni. Her mother reaches down and takes the paper. “Isn’t it great?”

“Why, yes, darling, it’s the most beautiful piece of art I’ve ever seen!”

macaroniwithjack

The original concept art Frank made for Where Shadows Slumber

Now, you and I know that the mother in this story is not telling the truth. Obviously, Where Shadows Slumber is the most beautiful piece of art she’s ever seen. But her daughter doesn’t know that – her daughter planned out the art, decided exactly how she would approach the task, and executed flawlessly.

Frank and I are the daughter in this metaphor, and Where Shadows Slumber is the macaroni masterpiece. We look at our game and we see something beautiful – but who knows what it actually looks like?

You do! You, our adoring public, are our mother. However, we need you to tell us the truth! We will never grow up to be a wonderful artist if you tell us that our macaroni levels are beautifully designed when they’re not.

This is the concept behind a lot of what we have been doing over the past year. We created a demo for the sole purpose of showing it to people and getting feedback about the game. We’re sending out test levels to get feedback about our level design. We even write this blog, in part, to get feedback about our process!

We use all of this feedback to help make Where Shadows Slumber a better game. That is the benefit of testing.


The Power of the POC

If you’re a game developer, and your friends and family know you’re a game developer, then there is a phenomenon I’m sure you’re quite familiar with. If not, allow me to explain.

Most people don’t understand the amount of time and effort that goes into the development of a game. Therefore, if someone thinks of a half-decent game idea, they come to you with it. If I had a dollar for every time someone has said “Jack, listen to this idea for a game – you’ll be a millionaire!”, I actually would be a millionaire.

So, you end with a lot more game ideas then you can possibly make. Some of them might actually be pretty good, but you’re just one person – how can you tell if an idea will end up working out? Do you have to just pick a concept, make the whole game, and then just hope that people like it?

This is exactly what proof of concept projects are for! Can you imagine if we had spent two years making the full game for Where Shadows Slumber, only to release it and find out that nobody enjoys shadow-based puzzles? What a waste! But spending two months working on a project that could become something big is totally worth it, even if people don’t like it.

POC

A shot from one of our earliest POCs

That’s exactly how Where Shadows Slumber started. I came up with the idea, and I immediately spent two months or so developing a POC, a very, very basic version of the game, that would just be used to tell if the game had any merit. I showed it to Frank and a few other friends, and they liked it, so we decided to make the full game. If they hadn’t liked it, then we would have scrapped the project. I would have wasted two months, but I would have known that it was a project not worth pursuing, without wasting even more time.


Testing Design

In my opinion, the hardest part of game development is design. Programming is easy enough, once you know what you want to program. Art, on the other hand, would be the hardest part if it weren’t for Frank, but that’s just because I’m bad at art.

Once you know what you want to make, programming and art are mostly execution on that vision. Coming up with that vision is the hard part. What is your game mechanic? How does it work? How do you explain how it works to the player? What does your difficulty curve look like? On and on, there are thousands of questions like this that you can apply to game design, and they’re all important.

This is one of the main reasons we try to get as many people as possible to play our game. There are certain realizations about design that you can only get by showing it to a lot of people and getting feedback. We never would have discovered how much people dislike ‘randomness’, which is something that could have played a major part in our game, if we hadn’t shown it to a bunch of people.

But even once you’ve made all of the decisions regarding your game’s mechanics, you still need that feedback on the last giant piece of the game design puzzle: level design. If you have an awesome mechanic, but your levels are boring and easy, or way too hard, nobody’s gonna want to play.

In order to prevent this, we’re doing some alpha testing! We have all of the levels designed, and we have all of the mechanics half-implemented, so we’re sending out test levels!

Crumble

This is what it would look like if I were in charge of the art…

These levels are ugly – but we’re not testing the art! These levels are buggy – but we’re not testing the code! These levels just might be poorly-designed, and that’s what we want to know. Our testers will tell us what they like and don’t like about these levels, and we will update them accordingly.

The important part of this process is that it’s happening as early as possible. If we sent out fully-complete levels, and then we had to change one, we would end up either scrapping the art, which is a huge waste, or trying to change the level without changing the art, which just makes it look weird. That’s why these levels look all dull – it’s all part of the plan!


Testing Philosophy

The last thing you want is to work hard for two years on a project, only to release it and find that it’s not as great as you thought it was. In particular, no matter how great you think it is, your audience might not enjoy it. While there will always be people that don’t like your game, it’s important to make sure that your target audience does like it. And how do you ensure that will happen? Testing!

It’s not a great experience to hear someone say they don’t like your game, and it’s perfectly natural to shy away from that. However, hearing that from a dozen people and still having time to make changes is a whole lot better than hearing it from a thousand people after you’ve already released the game.

Whether it be unit tests (small tests to make sure that one part of your code works) or beta testing (sending an almost-complete game out to fans to look for small bugs and last-minute fixes), testing is an important part of development. Don’t get caught up in your own little game-dev world; make sure you find out what the people want!

As always, let us know if you have any questions or comments about testing (or anything else)! You can always find out more about our game at WhereShadowsSlumber.com, find us on Twitter (@GameRevenant), Facebook, itch.io, or Twitch, and feel free to email us directly with any questions or feedback at contact@GameRevenant.com.


= = = = = = = = = = = = = = = = = = = = = = = = = = = = = = = = = = = =

Jack Kelly is the head developer and designer for Where Shadows Slumber.

Mechanic Spotlight: Shaders

Last week I promised I would write a more technical post. So this week, rather than talking about something I do know about, I’ll be talking about something I don’t know anything about, and then you can all tell me how wrong I am! Which brings me to the topic for this week – shaders!

Where Shadows Slumber has a relatively distinct visual style – the bright solid colors, the crisp black shadows, and the sharp line that separates them. Much of the artistic style is due, of course, to Frank’s art. However, a lot of it is also due to the custom shading that we set up.

screen_1920x3412_2017-03-20_22-04-51

Bright colors and sharp edges!

What is a Shader?

Unity describes a shader as a ‘small script that contains the mathematical calculations and algorithms for calculating the color of each pixel rendered, based on the lighting input and the Material configuration’. Basically, shaders determine how the rendering will happen, and how the look of your scene will be affected. Shaders give you a lot more control over exactly how everything will be calculated and rendered – lighting, shadows, gloss, reflections, etc. It’s a lot, and shaders get very complicated very quickly, but they allow you to craft a very distinct visual style.

Shaders are (generally) used by creating a material and specifying what shader that material should use for rendering. This allows you to use a shader for multiple materials, with potentially multiple different configurations.

Now, let me give you a quick disclaimer – I know enough about shaders to put together this one for Where Shadows Slumber, but I am definitely not an expert. So take everything I say with a grain of salt, and if you are an expert on shaders, feel free to let me know, because I’m sure there are some things I could be doing better.

I should also mention that, while I believe you can write CG shaders for some other engines, any specifics in this post will refer to shaders as they are used in Unity. Similarly, since Where Shadows Slumber uses forward rendering, this shader will also will be set up using forward rendering.


How real light works, and why that’s bad

Unity comes with something called the standard shader, which lets you get a lot of different visual effects without creating your own shader. It’s very powerful and very useful – so why not use it here?

The problem with the standard shader is that it’s too realistic. It calculates lighting based on the way that lights actually work, which is not what we want. A light in real life fades over distance, so it’s brightest at its center and much darker at the edges. While this is accurate, we want all areas that are in light to be the same brightness. Otherwise, the player would be too bright, but the edges of the light would be too dark.

shadercomparison2

The Unity standard shader (left), and the Where Shadows Slumber shader (right)

Enter our custom shader – in order to get the lighting right, we had to write our own shader, with a custom lighting model. This was a daunting task, but I’ll go through the overall steps we took to get there.


Not the most difficult shader

There are two types of shaders in Unity – Surface, and Vertex/Fragment shaders. Surface shaders are a little easier to write and understand, but they give you less control, as they do a lot of the calculations themselves (in reality, a surface shader is just a wrapper that gets compiled down to a vertex/fragment shader). Fortunately, we don’t really need to get too deep into the calculations for lighting and stuff – we’ll just let the surface shader calculate the lighting, and then we’ll use the results to determine what to draw.

So, we know that we have to make a surface shader. What exactly does that mean? How do we actually go in and start changing things? What does a shader really look like?

Drumroll please…


Our surface shader

Shader "CrispLightBasic_NoDir" {
  Properties {
    _Color("Color", Color) = (1, 1, 1, 1)
    _MainTex("Albedo (RGB)", 2D) = "white" {}
  }
  SubShader {
    Tags {
      "RenderType" = "Opaque"
    }

    CGPROGRAM
    #pragma surface surf TestForward addshadow fullforwardshadows
    #pragma target 2.0
    fixed4 _Color;
    sampler2D _MainTex;

    struct Input
    {
      float2 uv_MainTex;
    };

    void surf (Input IN, inout SurfaceOutput o)
    {
      fixed4 c = tex2D(_MainTex, IN.uv_MainTex) * _Color;
      o.Albedo = c.rgb;
    }

    half4 LightingTestForward(SurfaceOutput s, half3 lightDir, half atten)
    {
      half4 c;
      c.rgb = s.Albedo * _LightColor0.rgb * min(floor(300*atten), 1);
      c.a = 1;
      return c;
    }

    ENDCG
  }
  FallBack "Diffuse"
}

This is the simplest shader that we use in Where Shadows Slumber. It’s pretty self-explanatory, so I’ll let you figure it out.

Alright, I guess we can take a look at what’s actually happening here.

Anatomy of a shader

There are a lot of cool parts to a shader; let’s take a look at them from the top down.

  • Shader "CrispLightBasic_NoDir"

    Starting with an easy one! This just means that we’re making a shader, and giving it a name.

  • Properties {
      _Color("Color", Color) = (1, 1, 1, 1)
      _MainTex("Albedo (RGB)", 2D) = "white" {}
    }

    I like to think of the properties as ‘inputs’ to your shader. When you examine a material using your shader in the Unity inspector, these are the values that you will be able to change in order to get a different look.

    shaderproperties

    A material with our shader in Unity

    The line for each property consists of a name, an identifying string (which is what you’ll see in the inspector), a type, and a default value, in order. So our color variable has the name _Color, the description "Color", the type Color, and the default value (1, 1, 1, 1).

    The possible types for a property are Int, Float, Range, Color, Vector, and 2D (which represents a 2-dimensional texture).

  • SubShader {

    This just means that we’re actually starting the real shader block.

  • Tags {
      "RenderType" = "Opaque"
    }

    Tags are a way of telling Unity some stuff about the shader we’re writing. Unlike the properties above, these are constant to the shader. So, for this shader, we are telling Unity that this shader will always have a RenderType of Opaque.

    There are a few different tags you can use, and each of them have a few different options. In the interest of shortness, I won’t go into all of them here.

  • CGPROGRAM
    ...
    ENDCG

    These directives indicate that the actual CG code is contained between them. The CG code is what does the actual shading.

  • #pragma surface surf TestForward addshadow fullforwardshadows
    #pragma target 2.0

    #pragma statements indicate which shader functions to compile into your shader.

    The target pragma indicates the shader compilation target level – higher targets allow the use of more modern GPU functionality, but may prevent the shader from working on older GPUs. 2.0 is pretty low, since we aren’t going to end up doing anything fancy.

    The #pragma surface directive indicates information about our surface shader, and is always of the form:

    #pragma surface surfaceFunction lightModel [optionalparams]

    Thus, our surfaceFunction is surf and our lightModel is TestForward (both of which we will define later). The optionalparams which we provided are addshadow and fullforwardshadows, which allow meshes using our shader to both receive and cast shadows when using forward rendering.

    This concept of ‘optional parameters’ is kind of vague. Basically, it’s just another way to give information about your shader – this time, the information is about how the actual rendering is done. There are a lot of different options that you can put here, and, unfortunately, it’s not incredibly obvious when you might need one. If you’re not doing anything funky with your shader (lights, shadows, depth-testing, etc.), you’re probably fine. If you are, you might want to see if there are any optional params here you should be using.

  • fixed4 _Color;
    sampler2D _MainTex;

    Remember those properties we declared earlier? Those guys are cool and all, but these are the real variables used by the shader. Any of the properties you declared needs a variable (of the correct type) here, so that your shader can actually use the value you provided! In this case, we’re creating a fixed4 variable for our color value, and a sampler2D variable for our main texture. The data types for these variables are kind of strange, so let’s take a look:

    float, half, and fixed – these all represent floating-point numbers, with different precisions. The precisions are (generally) 32, 16, and 11 bits, respectively.

    – float4, half4, and fixed4 – these are 4-dimensional vector versions of the above types. They’re used for vectors (duh), but also for colors, which are of the form (r, g, b, a)

    sampler2D, sampler3D, and samplerCUBE – these sampler types represent textures; 2D is a 2D texture, 3D is a 3D texture, and CUBE is a cubemap.

  • struct Input
    {
      float2 uv_MainTex;
    };

    The Input structure is yet another representation of information passed to the shader, and generally contains texture coordinates. Texture coordinates must be named uv followed by texture name, and indicate positions of pixels on your textures. There are a bunch of other values you can put here, but, once again, I’m not going to list them all.

  • void surf (Input IN, inout SurfaceOutput o)
    {
      fixed4 c = tex2D(_MainTex, IN.uv_MainTex) * _Color;
      o.Albedo = c.rgb;
    }

    Ah, finally, here we are! We have made our way to the actual surface shading! This is the surface function that we specified in the #pragma surface directive. This function, at its core, describes the properties of a surface. It takes an Input, which we defined above, and a SurfaceOutput, which actually contains those properties (color, normal, emission, etc.). For our very simple shader, we only care about the color, so that’s the only value that we will provide. Note that it’s marked as inout, meaning that it’s both input and output – it comes in, we make changes to it, and then it gets used later, with those changes.

    The inside of this function is the important part, as it’s telling us what the shader will do at any given pixel position. Fortunately, this is a pretty simply one:

    In the first line, we’re calling tex2D, a function which performs a texture lookup. So we’re saying we want the color of _MainTex at the pixel coordinate provided by IN.uv_MainTex. This should make sense – after all, we created IN.uv_MainTex as a way to point to positions within _MainTex, which is exactly what we’re doing. Once we have the pixel color from the texture, we’re multiplying it by our _Color variable, which will result in a ‘tinted’ version of the texture. Finally, we are storing the result in a fixed4 variable, or a 4-dimensional vector of fixed-precision floating-point numbers.

    In the second line, we’re simply assigning the value we just calculated to the Albedo property of the SurfaceOutput variable o. The albedo color of an object is just the color of that object without any external influences (mainly, light). Since we haven’t applied any lighting yet, this is the property we want to set.

    So this function is pretty simple – it just gets the colors from the texture and tints them with the color we provided from the Unity inspector. Note that this function doesn’t return anything – it simply sets values on the SurfaceOutput object, which is used later.

  • half4 LightingTestForward(SurfaceOutput s, half3 lightDir, half atten)
    {
      half4 c;
      c.rgb = s.Albedo * _LightColor0.rgb * min(floor(300*atten), 1);
      c.a = 1;
      return c;
    }

    When we declared our surface shader using the #pragma surface directive above, we also specified a lighting model, which I so cleverly never renamed from TestForward. This function is where we apply our lighting, and it describes how light affects things. In most cases, the surface shader will handle this for you. However, since we want to give our lighting a somewhat special look, we need to mess around in here too.

    This function takes in our SurfaceOutput object (so we can know stuff about our surface), lightDir (a vector indication the direction the light is hitting the surface), and atten (a number indicating the strength of the light at this point). It returns a vector which indicates the color of the surface after the lighting has been applied. This function will run for every pixel on the surface, which allows us to return different values for each pixel.

    Since our shader is pretty simple, the logic in this function is simple as well. We create a vector, c, which we end up returning. We set its rgb values based on the color of the surface (and some other stuff), and set its a (alpha, or transparency) to 1 (completely opaque).

    The interesting part of the lighting model (and the whole shader) is the single line of calculation here, so I’ll go through it step by step.

    • c.rgb – This is the actual color value of the variable c, which is what we want to mess with.
    • s.Albedo –  This is the value we set in our surface function. It’s the actual color of the object at this point.
    • * _LightColor0.rgb – Ah, a piece of magic! We’re multiplying the color by something here, but what? Our lighting function will be called on any pixel once for each light that hits it. These are called passes. In forward rendering, _LightColor0 represents the color of the light that this pass is applying. So, we’re just tinting our surface’s color by the color of the light.
      There are two things to note here. These lighting passes only apply to per-pixel lights. Lighting is expensive, so the Unity quality settings will max out the number of per-pixel lights you can have. In order to create our look, we needed every light to be per-pixel, so we had to increase the cap.
      The other thing is the concept of blending. Since we may have multiple lights hitting the same spot, we’ll have two different color values for that spot. Unity needs to know how to combine them, and the default behavior is additive. This means that overlap between lights will be twice as bright, which may give it a ‘washed-out’ look. I won’t cover it here, but there are ways to change the blending behavior to achieve the look you want.
    • * min(floor(300*atten), 1) – Here’s the interesting part. atten tells you how bright the light is at this point; it gets lower as you move away from the source of the light. A normal lighting model would multiply the color by atten, which would result in a nice fading look. However, we don’t want any values in between 0 and 1. We want the light to be either on or off. So, this funky piece of math basically says ‘if the attenuation is above 0.003, show the whole color. Otherwise, show a shadow’. This is how we disregard the ‘fading’ of the light without disregarding where the light actually reaches.
  • FallBack "Diffuse"

    We started with something simple, and it looks like we’re gonna end that way too. The fallback shader is the shader that should be used if, for whatever reason, our custom shader is unable to be run on the GPU. This could happen if we’re running on older hardware, we specified too high of a shader compilation target level, or we simply made a mistake in the shader code. I find that the latter is almost always the case, as writing shaders correctly is so confusing as to be near-impossible.

    screen_1920x3412_2017-03-21_08-18-43

    The beautiful color of a broken shader!

    Note that the fallback should be inside the shader block, but outside of the subshader block.

Putting it all together

Going through the shader piece by piece took a lot longer than I thought it would, so I won’t go too in-depth here. Most of the shader is boilerplate, so there’s not too much happening anyways.

Basically, we’ve built a surface shader which accepts a texture and a color. We tell that shader that it’s opaque, that it should use shadows, and that it should compile to a very low set of GPU requirements. We also tell it to use a custom surface function to describe the properties of the surface, and a custom lighting model to figure out how light affects that surface. Together, these functions will tell us exactly what color each pixel should be rendered as.

Within the surface function, we simply grab the color from the provided texture, tint it with the provided color, and pass it along. Within the lighting function, we either return the color of the surface, tinted by the color of the light (if the pixel is within the light), or return the color black (if the pixel is in shadow). In this way, everything that is at all touched by light will show up as its full color, and anything in shadow will show up as a crisp, dark black.

Additional resources

Hopefully this adventure into shader-land has given you an idea of how shaders work, and what it was like to work with them. Like I said, I’m not a shader expert, so there may be some stuff you still want to know about shaders. Here are a few links that helped me out in my travels:

There are probably a hundred other pages I ended up reading on my quest for shader mastery, but I can’t find/remember all of them now. Anyways, sorry for going on about shaders for a metric year. I hope you learned a bit about the mysterious world of shaders, and if not, I just hope you didn’t die of boredom. Either way, if you got to this part of the post, well done!

As always, let us know if you have any questions or comments about shaders (or anything else)! You can always find out more about our game at WhereShadowsSlumber.com, find us on Twitter (@GameRevenant), Facebook, itch.io, or Twitch, and feel free to email us directly with any questions or feedback at contact@GameRevenant.com.

= = = = = = = = = = = = = = = = = = = = = = = = = = = = = = = = = = = =

Jack Kelly is the head developer and designer for Where Shadows Slumber.